Combining datasets after pre-processing
| Author(s) |
  Wendi Bacon Wendi Bacon Jonathan Manning Jonathan Manning
|
| Editor(s) |
 Helena Rasche Helena Rasche |
| Tester(s) |
 Julia Jakiela Julia Jakiela |
OverviewQuestions:
Objectives:
I have some AnnData files from different samples that I want to combine into a single file. How can I combine these and label them within the object?
Requirements:
Combine data matrices from different samples in the same experiment
Label the metadata for downstream processing
- Introduction to Galaxy Analyses
- Single Cell
- An introduction to scRNA-seq data analysis: slides slides
- Understanding Barcodes: tutorial hands-on
- Generating a single cell matrix using Alevin: tutorial hands-on
Time estimation: 1 hourSupporting Materials:Last modification: May 10, 2023License: Tutorial Content is licensed under Creative Commons Attribution 4.0 International License. The GTN Framework is licensed under MITShort Link: https://gxy.io/GTN:T00246
Introduction
This tutorial will take you from the multiple AnnData outputs of the previous tutorial to a single, combined AnnData object, ready for all the fun downstream processing. We will also look at how to add in metadata (for instance, SEX or GENOTYPE) for analysis later on.
AgendaIn this tutorial, we will cover:
Get Data
The sample data is a subset of the reads in a mouse dataset of fetal growth restriction Bacon et al. 2018 (see the study in Single Cell Expression Atlas and the project submission). Each of the 7 samples (N701 –> N707) has been run through the workflow from the Alevin tutorial.
You can access the data for this tutorial in multiple ways:
-
Your own history - If you’re feeling confident that you successfully ran a workflow on all 7 samples from the previous tutorial, and that your resulting 7 AnnData objects look right (you can compare with the answer key history), then you can use those! To avoid a million-line history, I recommend dragging the resultant datasets into a fresh history
There 3 ways to copy datasets between histories
-
From the original history
- Click on the galaxy-gear icon (History options) on the top of the history panel
- Click on Copy Dataset
-
Select the desired files
-
Give a relevant name to the “New history”
- Click on the new history name in the green box that have just appear to switch to this history
-
From the galaxy-columns View all histories
- Click on galaxy-columns View all histories on the top right
- Switch to the history in which the dataset should be copied
- Drag the dataset to copy from its original history
- Drop it in the target history
-
From the target history
- Click on User in the top bar
- Click on Datasets
- Search for the dataset to copy
- Click on it
- Click on Copy to History
-
- Importing from a history
- You can import this history for usegalaxy.eu
- You can import this history for usegalaxy.org
- Open the link to the shared history
- Click on the new-history Import history button on the top right
- Enter a title for the new history
- Click on Import
- Uploading from Zenodo (see below)
Hands-on: Data upload for 7 files
- Create a new history for this tutorial (if you’re not importing the history above)
Import the different AnnData files and the experimental design table from Zenodo.
https://zenodo.org/record/7075635/files/Experimental_Design.tsv
https://zenodo.org/record/7075635/files/N701-400k.h5ad
https://zenodo.org/record/7075635/files/N702-400k.h5ad
https://zenodo.org/record/7075635/files/N703-400k.h5ad
https://zenodo.org/record/7075635/files/N704-400k.h5ad
https://zenodo.org/record/7075635/files/N705-400k.h5ad
https://zenodo.org/record/7075635/files/N706-400k.h5ad
https://zenodo.org/record/7075635/files/N707-400k.h5ad
- Copy the link location
Open the Galaxy Upload Manager (galaxy-upload on the top-right of the tool panel)
- Select Paste/Fetch Data
Paste the link(s) into the text field
Press Start
- Close the window
- Rename the datasets
Check that the datatype is
h5ad, otherwise you will need to change each file toh5ad!
- Click on the galaxy-pencil pencil icon for the dataset to edit its attributes
- In the central panel, click on the galaxy-gear Convert tab on the top
- In the lower part galaxy-chart-select-data Datatypes, select
datatypes
- tip: you can start typing the datatype into the field to filter the dropdown menu
- Click the Save button
Inspect the galaxy-eye Experimental Design text file. This shows you how each N70X corresponds to a sample, and whether that sample was from a male or female. This will be important metadata to add to our sample, which we will add very similarly to how you added the gene_name and mito metadata previously!
Important tips for easier analysis
Tools are frequently updated to new versions. Your Galaxy may have multiple versions of the same tool available. By default, you will be shown the latest version of the tool. This may NOT be the same tool used in the tutorial you are accessing. Furthermore, if you use a newer tool in one step, and try using an older tool in the next step… this may fail! To ensure you use the same tool versions of a given tutorial, use the Tutorial mode feature.
- Open your Galaxy server
- Click on the curriculum icon on the top menu, this will open the GTN inside Galaxy.
- Navigate to your tutorial
- Tool names in tutorials will be blue buttons that open the correct tool for you
- Note: this does not work for all tutorials (yet)
- You can click anywhere in the grey-ed out area outside of the tutorial box to return back to the Galaxy analytical interface
Warning: Not all browsers work!
- We’ve had some issues with Tutorial mode on Safari for Mac users.
- Try a different browser if you aren’t seeing the button.
Comment
- The Galaxy tool search panel sometimes doesn’t find the tools we need from the thousands available.
- You’ll have a much easier time selecting tools from the panel (if you aren’t using tutorial mode!) if you are on the https://humancellatlas.usegalaxy.eu
Concatenating objects
Tools are frequently updated to new versions. Your Galaxy may have multiple versions of the same tool available. By default, you will be shown the latest version of the tool. This may NOT be the same tool used in the tutorial you are accessing. Furthermore, if you use a newer tool in one step, and try using an older tool in the next step… this may fail! To ensure you use the same tool versions of a given tutorial, use the Tutorial mode feature.
- Open your Galaxy server
- Click on the curriculum icon on the top menu, this will open the GTN inside Galaxy.
- Navigate to your tutorial
- Tool names in tutorials will be blue buttons that open the correct tool for you
- Note: this does not work for all tutorials (yet)
- You can click anywhere in the grey-ed out area outside of the tutorial box to return back to the Galaxy analytical interface
Warning: Not all browsers work!
- We’ve had some issues with Tutorial mode on Safari for Mac users.
- Try a different browser if you aren’t seeing the button.
Hands-on: Concatenating AnnData objects
- Manipulate AnnData Tool: toolshed.g2.bx.psu.edu/repos/iuc/anndata_manipulate/anndata_manipulate/0.7.5+galaxy1 with the following parameters:
- param-file “Annotated data matrix”:
N701-400k- “Function to manipulate the object”:
Concatenate along the observations axis- param-file “Annotated data matrix to add”:
Select all the other matrix files from bottom to top, N707 to N702Warning: N707 to N702!You are adding files to N701, so do not add N701 to itself!
- “Join method”:
Intersection of variables- “Key to add the batch annotation to obs”:
batch- “Separator to join the existing index names with the batch category”:
-- Rename galaxy-pencil output
Combined Object
Now let’s look at what we’ve done! Unfortunately, AnnData objects are quite complicated, so the galaxy-eye won’t help us too much here. Instead, we’re going to use a tool to look into our object from now on.
Hands-on: Inspecting AnnData Objects
- Inspect AnnData Tool: toolshed.g2.bx.psu.edu/repos/iuc/anndata_inspect/anndata_inspect/0.7.5+galaxy1 with the following parameters:
- param-file “Annotated data matrix”:
Combined object- “What to inspect?”:
General information about the object- Inspect AnnData Tool: toolshed.g2.bx.psu.edu/repos/iuc/anndata_inspect/anndata_inspect/0.7.5+galaxy1 with the following parameters:
- param-file “Annotated data matrix”:
Combined object- “What to inspect?”:
Key-indexed observations annotation (obs)- Inspect AnnData Tool: toolshed.g2.bx.psu.edu/repos/iuc/anndata_inspect/anndata_inspect/0.7.5+galaxy1 with the following parameters:
- param-file “Annotated data matrix”:
Combined object- “What to inspect?”:
Key-indexed annotation of variables/features (var)
Now have a look at the three tool Inspect AnnData outputs.
Question
- How many cells do you have now?
- Where is
batchinformation stored?
- If you look at the General information tool output, you can see there are now
338 cells, as the matrix is now 338 cells x 35734 genes. You can see this as well in the obs tool (cells) and var tool (genes) file sizes.- Under Key-indexed observations annotation (obs). Different versions of the Manipulate tool will put the
batchcolumns in different locations. The tool version in this course putsbatchin the8thcolumn. Batch refers to the order in which the matrices were added. The files are added from the bottom of the history upwards, so be careful how you set up your histories when running this (i.e. if your first dataset is N703 and the second is N701, thebatchwill call N7030and N7011!)
Adding batch metadata
I set up the example history with the earliest indices at the bottom.
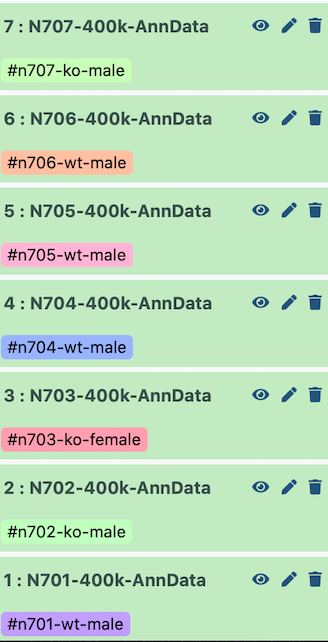
Therefore, when it is all concatenated together, the batch appears as follows:
| Index | Batch | Genotype | Sex |
|---|---|---|---|
| N701 | 0 | wildtype | male |
| N702 | 1 | knockout | male |
| N703 | 2 | knockout | female |
| N704 | 3 | wildtype | male |
| N705 | 4 | wildtype | male |
| N706 | 5 | wildtype | male |
| N707 | 6 | knockout | male |
If you used Zenodo to import files, they may not have imported in order (i.e. N701 to N707, ascending). In that case, you will need to tweak the parameters of the next tools appropriately to label your batches correctly!
The two critical pieces of metadata in this experiment are sex and genotype. I will later want to color my cell plots by these parameters, so I want to add them in now!
Hands-on: Labelling sex
- Replace Text in a specific column Tool: toolshed.g2.bx.psu.edu/repos/bgruening/text_processing/tp_replace_in_column/1.1.3 with the following parameters:
- param-file “File to process”: output of Inspect AnnData: Key-indexed observations annotation (obs) tool)
“1. Replacement”
- “in column”:
Column: 8- or whichever columnbatchis in- “Find pattern”:
0|1|3|4|5|6- “Replace with”:
male- + Insert Replacement
“2. Replacement”
- “in column”:
Column: 8- “Find pattern”:
2- “Replace with”:
female- + Insert Replacement
“3. Replacement”
- “in column”:
Column: 8- “Find pattern”:
batch- “Replace with”:
sexRun this tool - we will use the output in Step 2.
From the output of Step 1 we want only the single column containing the sex information - we will ultimately add this into the cell annotation in the AnnData object.
- Cut columns from a table Tool: Cut1 with the following parameters:
- “Cut columns”:
c8- “Delimited by”:
Tab- param-file “From”: output of Replace text tool
- Rename galaxy-pencil output
Sex metadata
That was so fun, let’s do it all again but for genotype!
Hands-on: Labelling genotype
- Replace Text in a specific column Tool: toolshed.g2.bx.psu.edu/repos/bgruening/text_processing/tp_replace_in_column/1.1.3 with the following parameters:
- param-file “File to process”: output of Inspect AnnData: Key-indexed observations annotation (obs) tool
“1. Replacement”
- “in column”:
Column: 8- “Find pattern”:
0|3|4|5- “Replace with”:
wildtype- + Insert Replacement
“2. Replacement”
- “in column”:
Column: 8- “Find pattern”:
1|2|6- “Replace with”:
knockout- + Insert Replacement
“3. Replacement”
- “in column”:
Column: 8- “Find pattern”:
batch- “Replace with”:
genotypeNow we want only the column containing the genotype information - we will ultimately add this into the cell annotation in the AnnData object.
- Cut columns from a table Tool: Cut1 with the following parameters:
- “Cut columns”:
c8- “Delimited by”:
Tab- param-file “From”: output of Replace text tool
- Rename galaxy-pencil output
Genotype metadata
You might want to do this with all sorts of different metadata - which labs handled the samples, which days they were run, etc. Once you’ve added all your metadata columns, we can add them together before plugging them into the AnnData object itself.
Hands-on: Combining metadata columns
- Paste two files side by side Tool: Paste1 with the following parameters:
- param-file “Paste”:
Genotype metadata- param-file “and”:
Sex metadata- “Delimit by”:
Tab- Rename galaxy-pencil output
Cell Metadata
Let’s add it to the AnnData object!
Hands-on: Adding metadata to AnnData object
- Manipulate AnnData Tool: toolshed.g2.bx.psu.edu/repos/iuc/anndata_manipulate/anndata_manipulate/0.7.5+galaxy1 with the following parameters:
- param-file “Annotated data matrix”:
Combined object- “Function to manipulate the object”:
Add new annotation(s) for observations or variables- “What to annotate?”:
Observations (obs)`- param-file “Table with new annotations”:
Cell Metadata
Woohoo! We’re there! You can run an Inspect AnnData Tool: toolshed.g2.bx.psu.edu/repos/iuc/anndata_inspect/anndata_inspect/0.7.5+galaxy1 to check now, but I want to clean up this AnnData object just a bit more first. It would be a lot nicer if ‘batch’ meant something, rather than ‘the order in which the Manipulate AnnData tool added my datasets’.
Hands-on: Labelling batches
- Manipulate AnnData Tool: toolshed.g2.bx.psu.edu/repos/iuc/anndata_manipulate/anndata_manipulate/0.7.5+galaxy1 with the following parameters:
- param-file “Annotated data matrix”: output of Manipulate AnnData - Add new annotations tool
- “Function to manipulate the object”:
Rename categories of annotation- “Key for observations or variables annotation”:
batch- “Comma-separated list of new categories”:
N701,N702,N703,N704,N705,N706,N707- Rename galaxy-pencil output
Batched Object
Huzzah! We are JUST about there. However, while we’ve been focussing on our cell metadata (sample, batch, genotype, etc.) to relabel the ‘observations’ in our object…
Mitochondrial reads
Do you remember when we mentioned mitochondria early on in this tutorial? And how often in single cell samples, mitochondrial RNA is often an indicator of stress during dissociation? We should probably do something with our column of true/false in the gene annotation that tells us information about the cells. You will need to do this whether you have combined FASTQ files or are analysing just one.
Hands-on: Calculating mitochondrial RNA in cells
- AnnData Operations Tool: toolshed.g2.bx.psu.edu/repos/ebi-gxa/anndata_ops/anndata_ops/1.8.1+galaxy0 with the following parameters:
- param-file “Input object in hdf5 AnnData format”:
Batched Object- “Format of output object”:
AnnData format- “Gene symbols field in AnnData”:
NA.- “Flag genes that start with these names”:
Insert Flag genes that start with these names- “Starts with”:
True- “Var name”:
mito- Rename galaxy-pencil output
Annotated Object
congratulationsWell done! I strongly suggest have a play with the Inspect AnnData tool on your final Pre-processed object to see the wealth of information that has been added. You are now ready to move along to further filtering! There is a cheat that may save you time in the future though…
Pulling single cell data from public resources
If you happen to be interested in analysing publicly available data, particularly from the Single Cell Expression Atlas, you may be interested in the following tool Moreno et al. 2020 which combines all these steps into one! For this tutorial, the dataset can be seen at the EBI with experiment id of E-MTAB-6945.
Hands-on: Retrieving data from Single Cell Expression Atlas
- EBI SCXA Data Retrieval Tool: toolshed.g2.bx.psu.edu/repos/ebi-gxa/retrieve_scxa/retrieve_scxa/v0.0.2+galaxy2 with the following parameters:
- “SC-Atlas experiment accession”:
E-MTAB-6945- “Choose the type of matrix to download”:
Raw filtered countsNow we need to transform this into an AnnData objects
- Scanpy Read10x Tool: toolshed.g2.bx.psu.edu/repos/ebi-gxa/scanpy_read_10x/scanpy_read_10x/1.8.1+galaxy0 with the following parameters:
- “Expression matrix in sparse matrix format (.mtx)”:
EBI SCXA Data Retrieval on E-MTAB-6945 matrix.mtx (Raw filtered counts)- “Gene table”:
EBI SCXA Data Retrieval on E-MTAB-6945 genes.tsv (Raw filtered counts)- “Barcode/cell table”:
EBI SCXA Data Retrieval on E-MTAB-6945 barcodes.tsv (Raw filtered counts)- “Cell metadata table”:
EBI SCXA Data Retrieval on E-MTAB-6945 exp_design.tsv
It’s important to note that this matrix is processed somewhat through the SCXA pipeline, which is quite similar to this tutorial, and it contains any and all metadata provided by their pipeline as well as the authors (for instance, more cell or gene annotations).
Conclusion
You’ve reached the end of this session!
You may be interested in seeing an example history and workflow. Note that the workflow will require changing of the column containing the batch metadata depending on how you are running it. The final object containing the total the reads can be found in this Galaxy History on UseGalaxy EU.
To discuss with like-minded scientists, join our Gitter channel for all things Galaxy-single cell!

Key points
Create a single scanpy-accessible AnnData object from multiple AnnData files, including relevant cell metadata according to the study design
Retreive partially analysed data from a public repository
Frequently Asked Questions
Have questions about this tutorial? Check out the tutorial FAQ page or the FAQ page for the Single Cell topic to see if your question is listed there. If not, please ask your question on the GTN Gitter Channel or the Galaxy Help ForumUseful literature
Further information, including links to documentation and original publications, regarding the tools, analysis techniques and the interpretation of results described in this tutorial can be found here.
References
- Bacon, W. A., R. S. Hamilton, Z. Yu, J. Kieckbusch, D. Hawkes et al., 2018 Single-Cell Analysis Identifies Thymic Maturation Delay in Growth-Restricted Neonatal Mice. Frontiers in Immunology 9: 10.3389/fimmu.2018.02523
- Moreno, P., N. Huang, J. R. Manning, S. Mohammed, A. Solovyev et al., 2020 User-friendly, scalable tools and workflows for single-cell analysis. bioRxiv. 10.1101/2020.04.08.032698 https://www.biorxiv.org/content/early/2020/04/09/2020.04.08.032698
Feedback
Did you use this material as an instructor? Feel free to give us feedback on how it went.
Did you use this material as a learner or student? Click the form below to leave feedback.

Citing this Tutorial
- Wendi Bacon, Jonathan Manning, Combining datasets after pre-processing (Galaxy Training Materials). http://0.0.0.0:4000/training-material/topics/single-cell/tutorials/scrna-case_alevin-combine-datasets/tutorial.html Online; accessed TODAY
- Batut et al., 2018 Community-Driven Data Analysis Training for Biology Cell Systems 10.1016/j.cels.2018.05.012
Congratulations on successfully completing this tutorial!@misc{single-cell-scrna-case_alevin-combine-datasets, author = "Wendi Bacon and Jonathan Manning", title = "Combining datasets after pre-processing (Galaxy Training Materials)", year = "", month = "", day = "" url = "\url{http://0.0.0.0:4000/training-material/topics/single-cell/tutorials/scrna-case_alevin-combine-datasets/tutorial.html}", note = "[Online; accessed TODAY]" } @article{Hiltemann_2023, doi = {10.1371/journal.pcbi.1010752}, url = {https://doi.org/10.1371%2Fjournal.pcbi.1010752}, year = 2023, month = {jan}, publisher = {Public Library of Science ({PLoS})}, volume = {19}, number = {1}, pages = {e1010752}, author = {Saskia Hiltemann and Helena Rasche and Simon Gladman and Hans-Rudolf Hotz and Delphine Larivi{\`{e}}re and Daniel Blankenberg and Pratik D. Jagtap and Thomas Wollmann and Anthony Bretaudeau and Nadia Gou{\'{e}} and Timothy J. Griffin and Coline Royaux and Yvan Le Bras and Subina Mehta and Anna Syme and Frederik Coppens and Bert Droesbeke and Nicola Soranzo and Wendi Bacon and Fotis Psomopoulos and Crist{\'{o}}bal Gallardo-Alba and John Davis and Melanie Christine Föll and Matthias Fahrner and Maria A. Doyle and Beatriz Serrano-Solano and Anne Claire Fouilloux and Peter van Heusden and Wolfgang Maier and Dave Clements and Florian Heyl and Björn Grüning and B{\'{e}}r{\'{e}}nice Batut and}, editor = {Francis Ouellette}, title = {Galaxy Training: A powerful framework for teaching!}, journal = {PLoS Comput Biol} Computational Biology} }
Go FurtherDo you want to extend your knowledge? Follow one of our recommended follow-up trainings:
- Single Cell
- Filter, Plot and Explore Single-cell RNA-seq Data: tutorial hands-on
Galaxy Administrators: Install the missing toolsYou can use Ephemeris's
shed-tools installcommand to install the tools used in this tutorial.shed-tools install [-g GALAXY] [-a API_KEY] -t <(curl http://localhost:4000//training-material//api/topics/single-cell/tutorials/scrna-case_alevin-combine-datasets/tutorial.json | jq .admin_install_yaml -r)Alternatively you can copy and paste the following YAML
--- {}